Flow+ is a revolutionary application that allows you to control remotely the most important features of Cubase and Vienna, hiding the complexity of the sound libraries and acting like a sort of database of your entire set of sounds.
Flow+ is built using Open Stage Control and is made of a server that you need to run in your DAW machine and clients that can be opened in any browser connected to the same network. You can use Flow+ within your large touch screen, tablet or phone.
For more information on Open Stage Control visit the official project page.
At startup you need to activate the license that you have received with your order.
To do so you can follow the instruction in the setup guide available here
In Flow+ there are 5 different windows that can be switched on/off and that will allow you to interact with your DAW in different moments of your workflow.
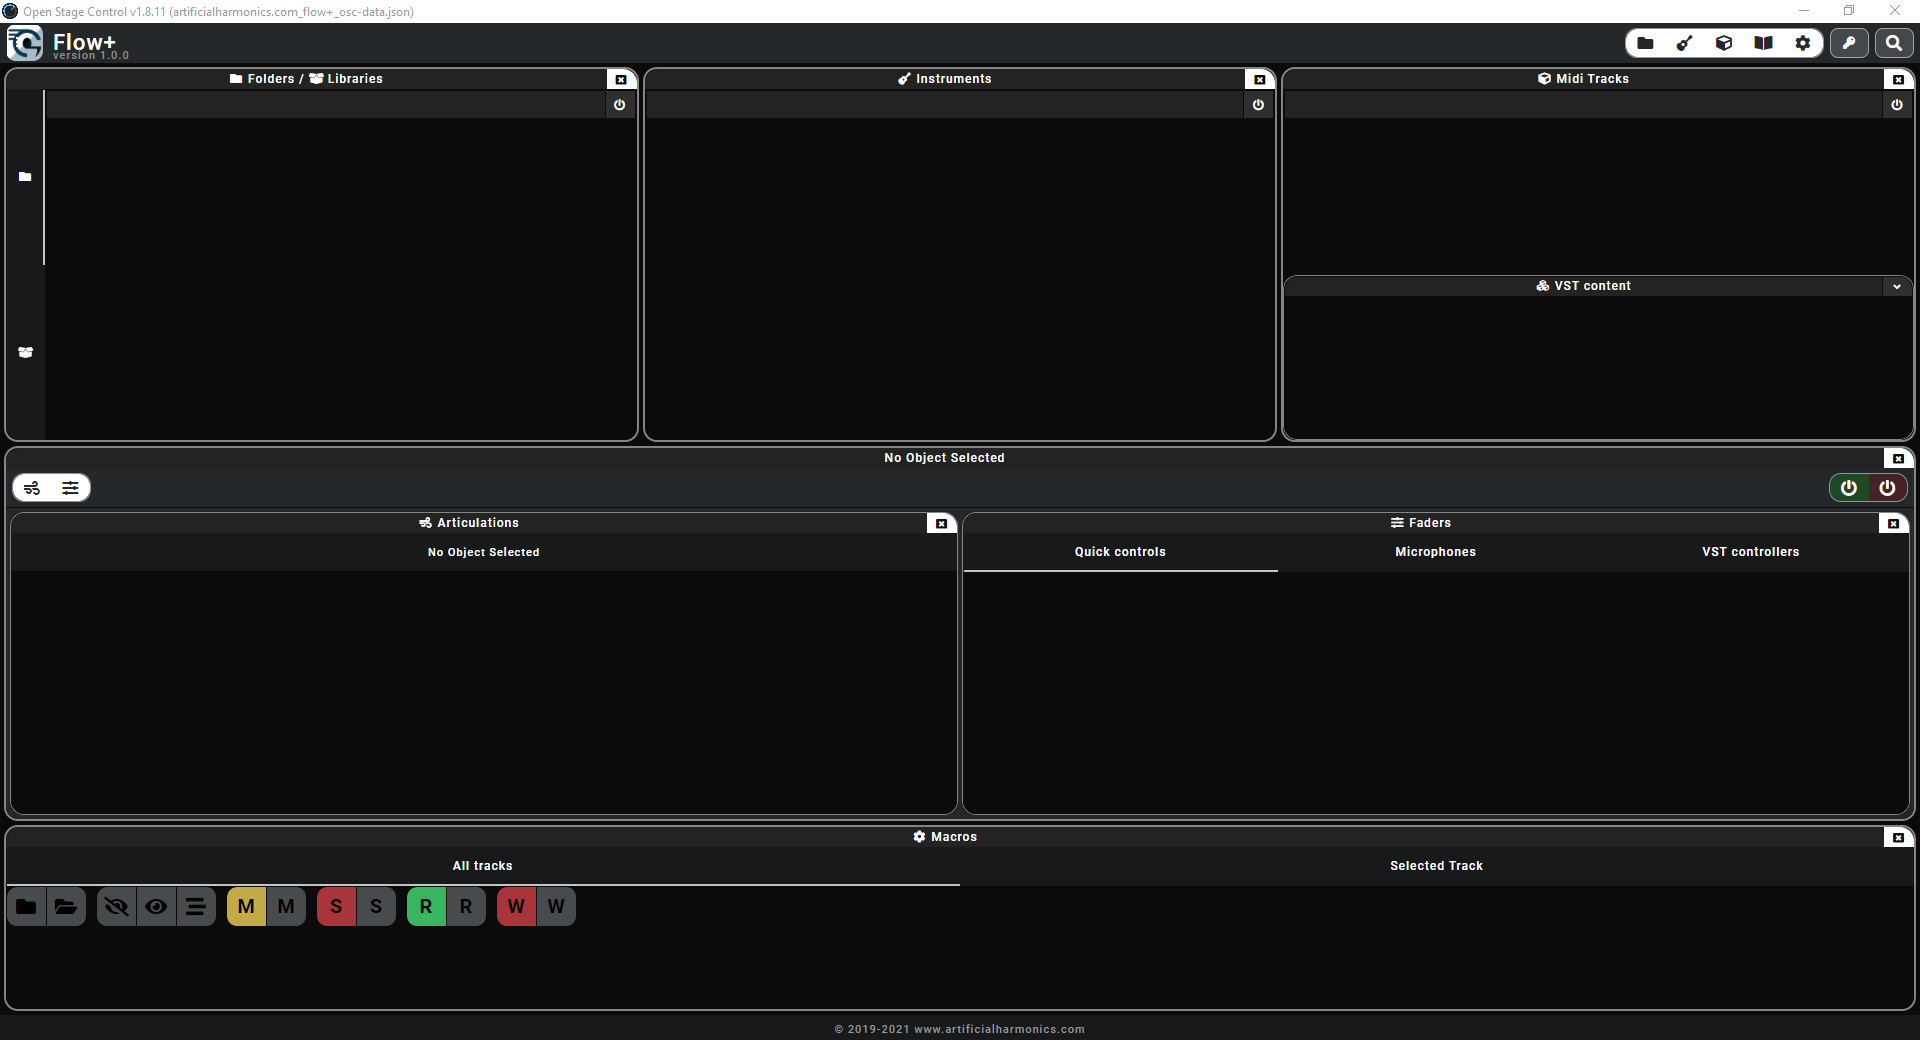
- Folders / Libraries: to interact with your DAW at the level of folders and libraries
- Instruments: to interact with your DAW at the level of single instruments
- Midi Tracks: to interact with your DAW at the level of midi tracks. This window has a detailed window “VST content” that shows the VST controls of the selected midi track
- Content: Here you can see all the details of the track selected in Cubase and perform the main actions like switching on/off, changing articulation or using the quick controls and faders
- Marcos: a series of macros that interact with Cubase
Each of those window can be toggled on/off using the actions in the following menu:

This will allow to adapt the content of Flow+ to the size of the screen you are actually using.
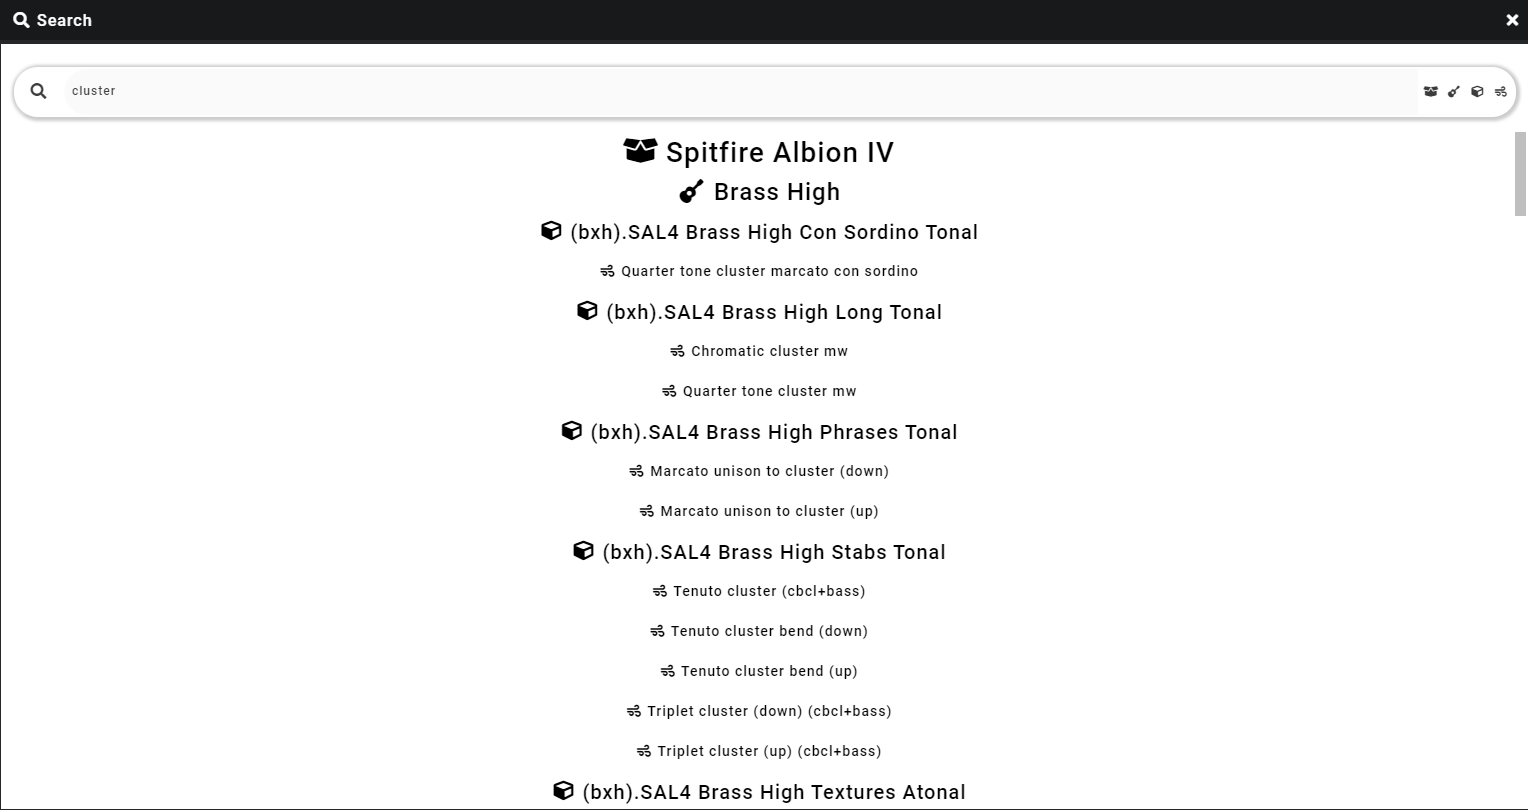
Flow+ can be also considered as an off-line application to navigate through the content of your set of libraries.
If offers a search function which can be launched through the search icon in the top menu 
After clicking on this button the search window will appear.

Use the input area to type any text and press Enter. The result will show any library, instrument, midi track or articulation which are related to the searched text.
You can use the four buttons on the right of the search area to choose to view only certain types of object in the final result:
The Folders/Libraries, instruments and midi tracks windows have a similar behavior: they have a master toolbar with global action and an area to display the content with a series of actions related to a single object within the content.
When one of those windows is opened the master toolbar has one single action which activate the window and show its content, changing also the actions that are contained in the master toolbar.
Once activated the master menu will appear with its actions and the content will be loaded in the main area.
The master menu is made of the following actions (from left to right)

- Toggle folders: Open and Close all the folders in Flow+ and in your DAW depending on the synch button (not available in midi tracks)
- Sync: if is on it will also trigger an action in your DAW when a folder is opened/closed otherwise the action will remain restricted to Flow+ (not available in midi tracks)
- Remove filters: remove any filter applied to the content of this window (only for instruments and midi tracks)
- Keep content: when enabled the midi tracks in your DAW that contains content will always remain visible whatever action you perform. If disabled those tracks will disappear like any other track. Decide the best way to work depending on your workflow.
- Show all: this will show all the midi tracks in your DAW
- Hide all: this will hide all the midi tracks in your DAW
- On/Off: this will switch on or off the content of this window. This feature can be used to save resources since a disabled window has no impact on the usage footprint of the application (useful for old tablets with poor RAM or CPU)
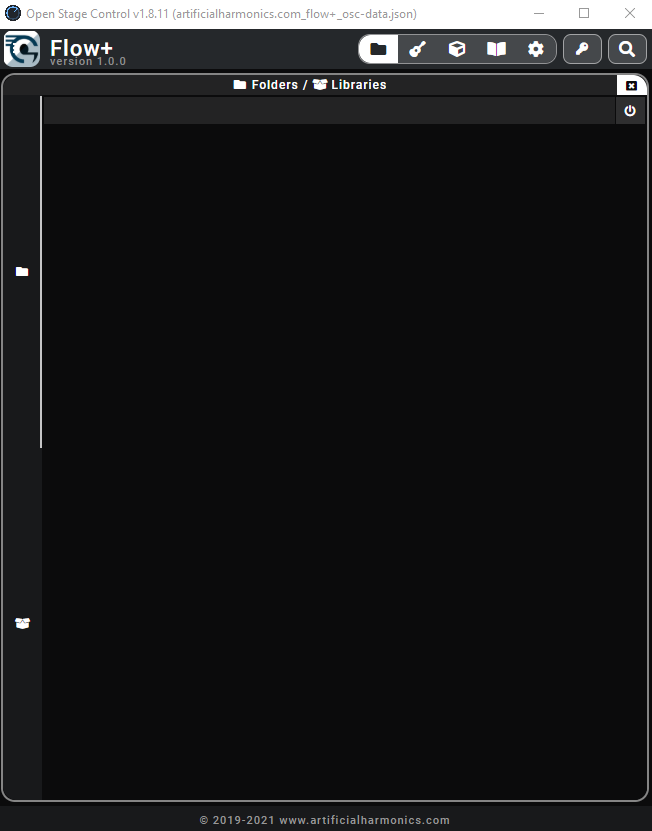
Through this window you can interact with your DAW performing a series of actions at the level of folders and libraries. You can also use this window to explore off-line the content of your sound set.
When first you open the window it appears like the first image below. On the left side you have two different tabs to switch the view from folders to libraries. For each of this view you need to click on the  button to activate it and start to navigate through the content.
As soon as it is activated the window will look like the second picture below. Please note that the content shown depends on the data you have purchased, since only the folders related to the content of your product is displayed.
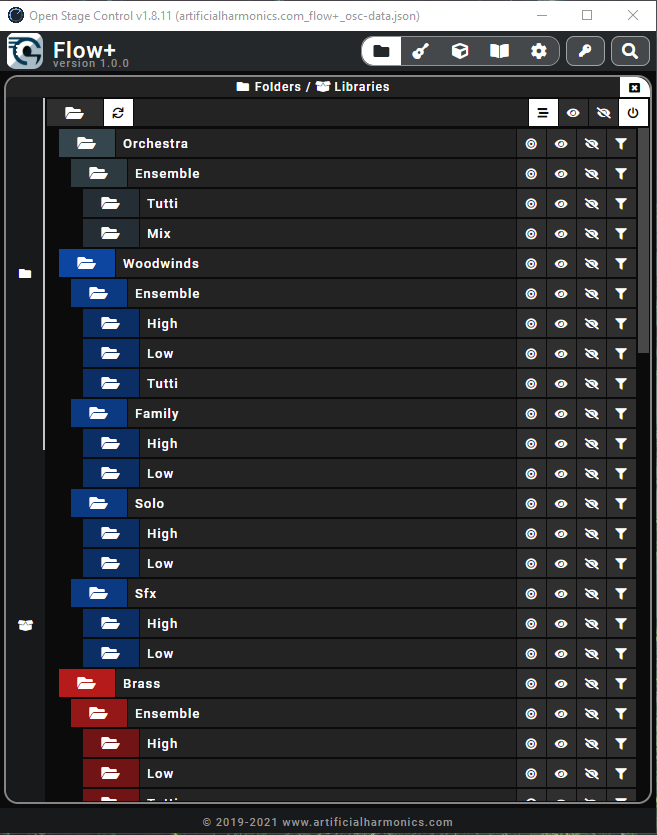
In the content view you will have a list of objects which are mapped to similar objects in your DAW and a series of actions that can be performed
Actions are the following from left to right:
- Toggle folder: open or close the selected folder
- Show only: show in DAW only the content of the selected folder (except if Keep content is on)
- Show: show in DAW the content of the selected folder
- Hide: hide in DAW the content of the selected folder
- Filter: applies a filter on other windows (from left to right) based on the selected folder. Filters selected here are applied to the instrument window and to the midi tracks window.
The libraries window has a similar behavior to the folder one, after switching to this window using the left tab activate it and you will see the same master toolbar and content appearing
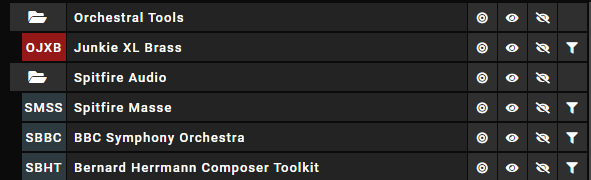
Actions are the following from left to right. Please note that when actions are applied to the vendor object it has a global effect on all libraries of that vendor.
- Toggle folder: open or close the selected library or vendor, NB this action does not have any effect in your DAW
- Show only: show in DAW only the content of the selected library or vendor(except if Keep content is on).
- Show: show in DAW the content of the selected library or vendor
- Hide: hide in DAW the content of the selected library or vendor
- Filter: applies a filter on other windows (from left to right) based on the selected library (not available for the vendor object). Filters selected here are applied to the instrument window and to the midi tracks window.
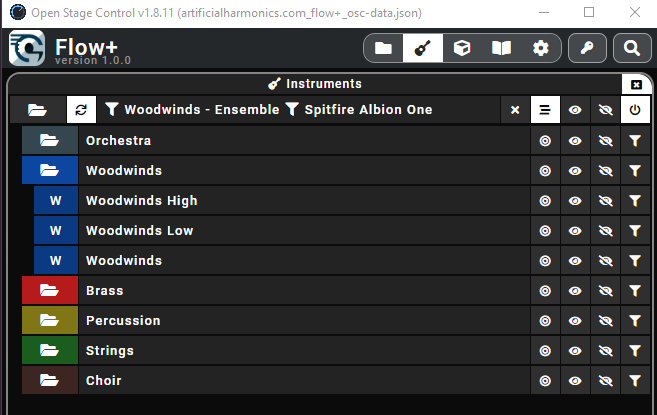
Through this window you can interact with your DAW performing a series of actions at the level of instruments. You can also use this window to explore off-line the content of your sound set.
When first you open the window you need to click on the button to activate it and start to navigate through the content.
As soon as it is activated the window will look like the picture below. Please note that the content shown depends on the data you have purchased, since only the folders related to the content of your product is displayed.
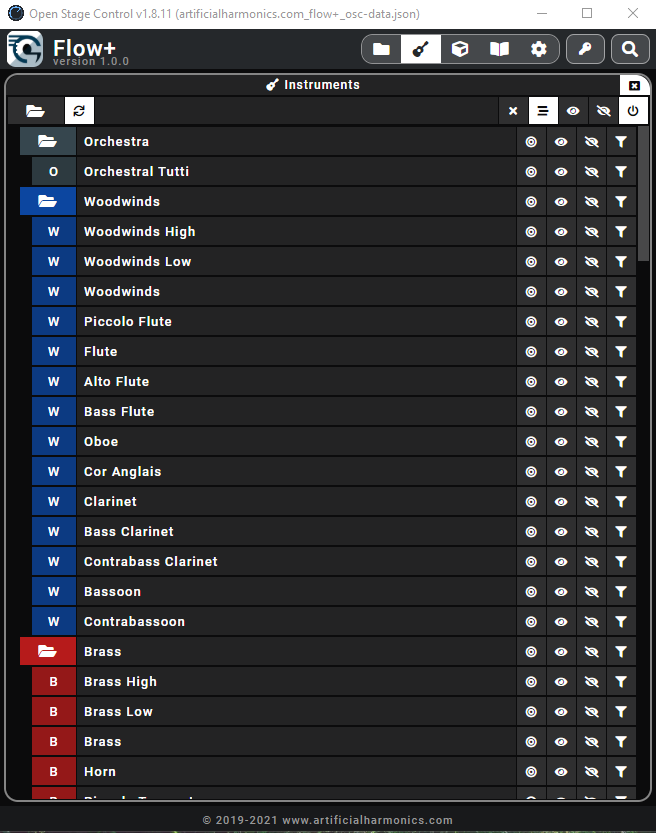
Like for the folders and libraries windows a series of actions are available for each of the instrument, from left to right:
- Toggle folder: open or close the selected folder, NB this action does not have any effect in your DAW
- Show only: show in DAW only the content of the selected instrument (except if Keep content is on)
- Show: show in DAW the content of the selected instrument
- Hide: hide in DAW the content of the selected instrument
- Filter: applies a filter on other windows (from left to right) based on the selected folder. Filters selected here are applied to the midi tracks window.
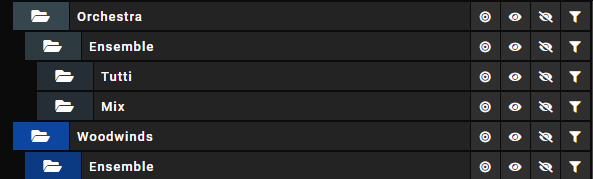
When a filter has been applied from the folders or library window you will see that those filters are displayed in the master toolbar and that the content is actually filtered based on the filters applied like in the picture below.
When filters are applied the instrument actions will also take this in consideration when interacting with Cubase showing only tracks that are consistent with the filters applied NB this works only for the show and show only actions and not the hide action
You can click on the button in the master toolbar to remove those filters.
Through this window you can interact with your DAW performing a series of actions at the level of MIDI tracks. You can also use this window to explore off-line the content of your sound set.
When first you open the window you need to click on the button to activate it and start to navigate through the content.
Differently from the other windows, when activated it will show no content and you will need to apply any filter to make content visible. This is done to prevent the application from creating a huge number of objects (which in large templates can be up to 1000) and reduce the resources usage footprint.
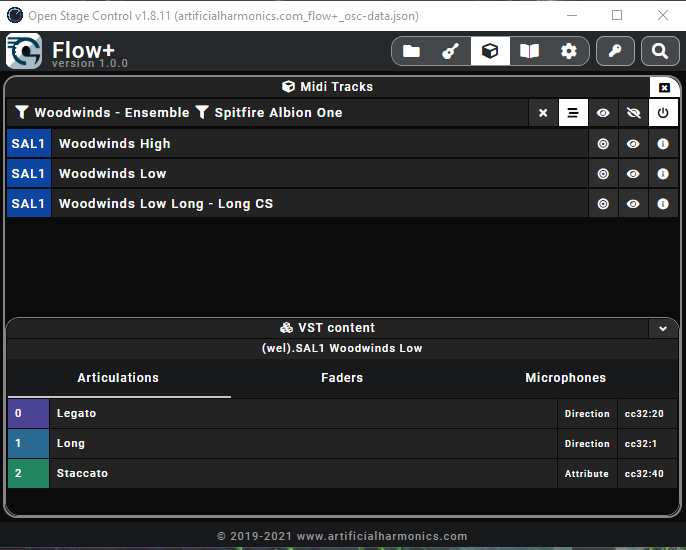
As soon as you have applied a filter in one of the folders, libraries or instruments window it will look like the picture below. Please note that the content shown depends on the data you have purchased, since only the folders related to the content of your product is displayed.
Like for the other windows a series of actions are available for each of the instrument, from left to right:
- Show only: show in DAW only the content of the selected instrument (except if Keep content is on)
- Show: show in DAW the content of the selected instrument
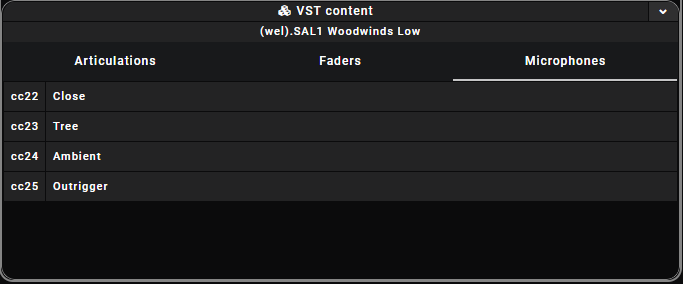
- Info: update the content of the bottom “VST content” area to the selected object. Please note that this area is empty by default
You can use the VST content area to visualize all articulations, faders and microphones which are currently configured for that midi track.
This window is the online part of the application, showing the content of the track currently selected in DAW and allowing you to interact with Cubase and Vienna without actually opening them.
One no track is shown the window will look like the picture below, showing a text “No Object Selected”
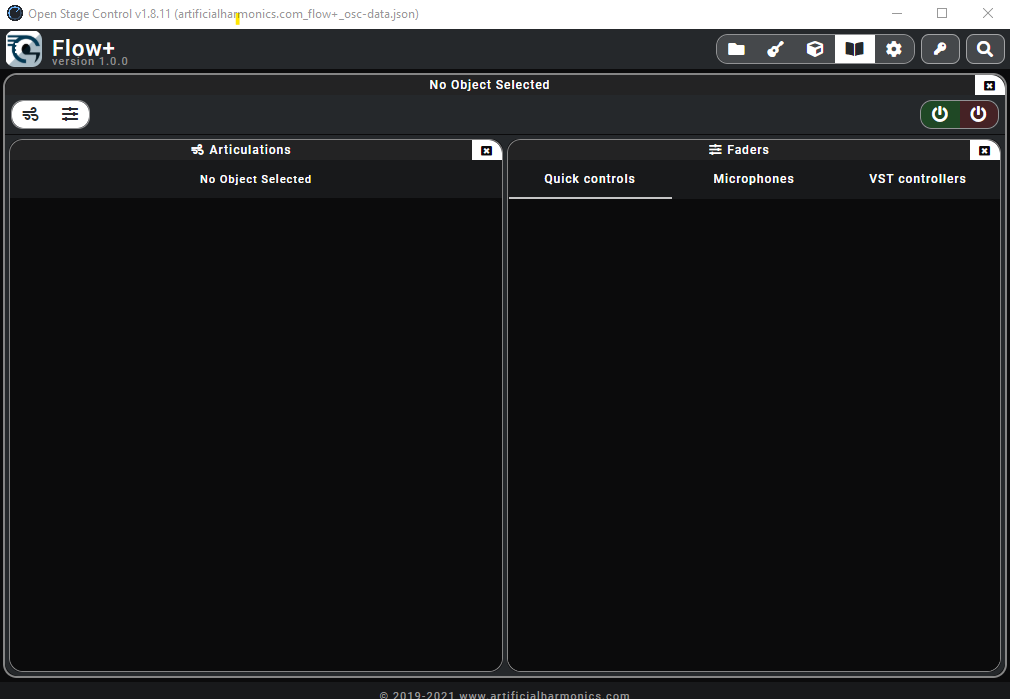
The main toolbar of this window has the following actions (from left to right)
- Toggle articulations window: show or hide the window with articulations information
- Toggle faders window: show or hide the window with faders information
- Activate the track in Vienna: clicking this button you will activate the bus in Vienna, which is always disabled in the default template. Make sure the rack instance in Cubase is active before performing this operation
As soon as you will select any MIDI track in Cubase you will see content appearing in those windows, like in the picture below, and you will see the name of the selected track appearing in the title area of the window.
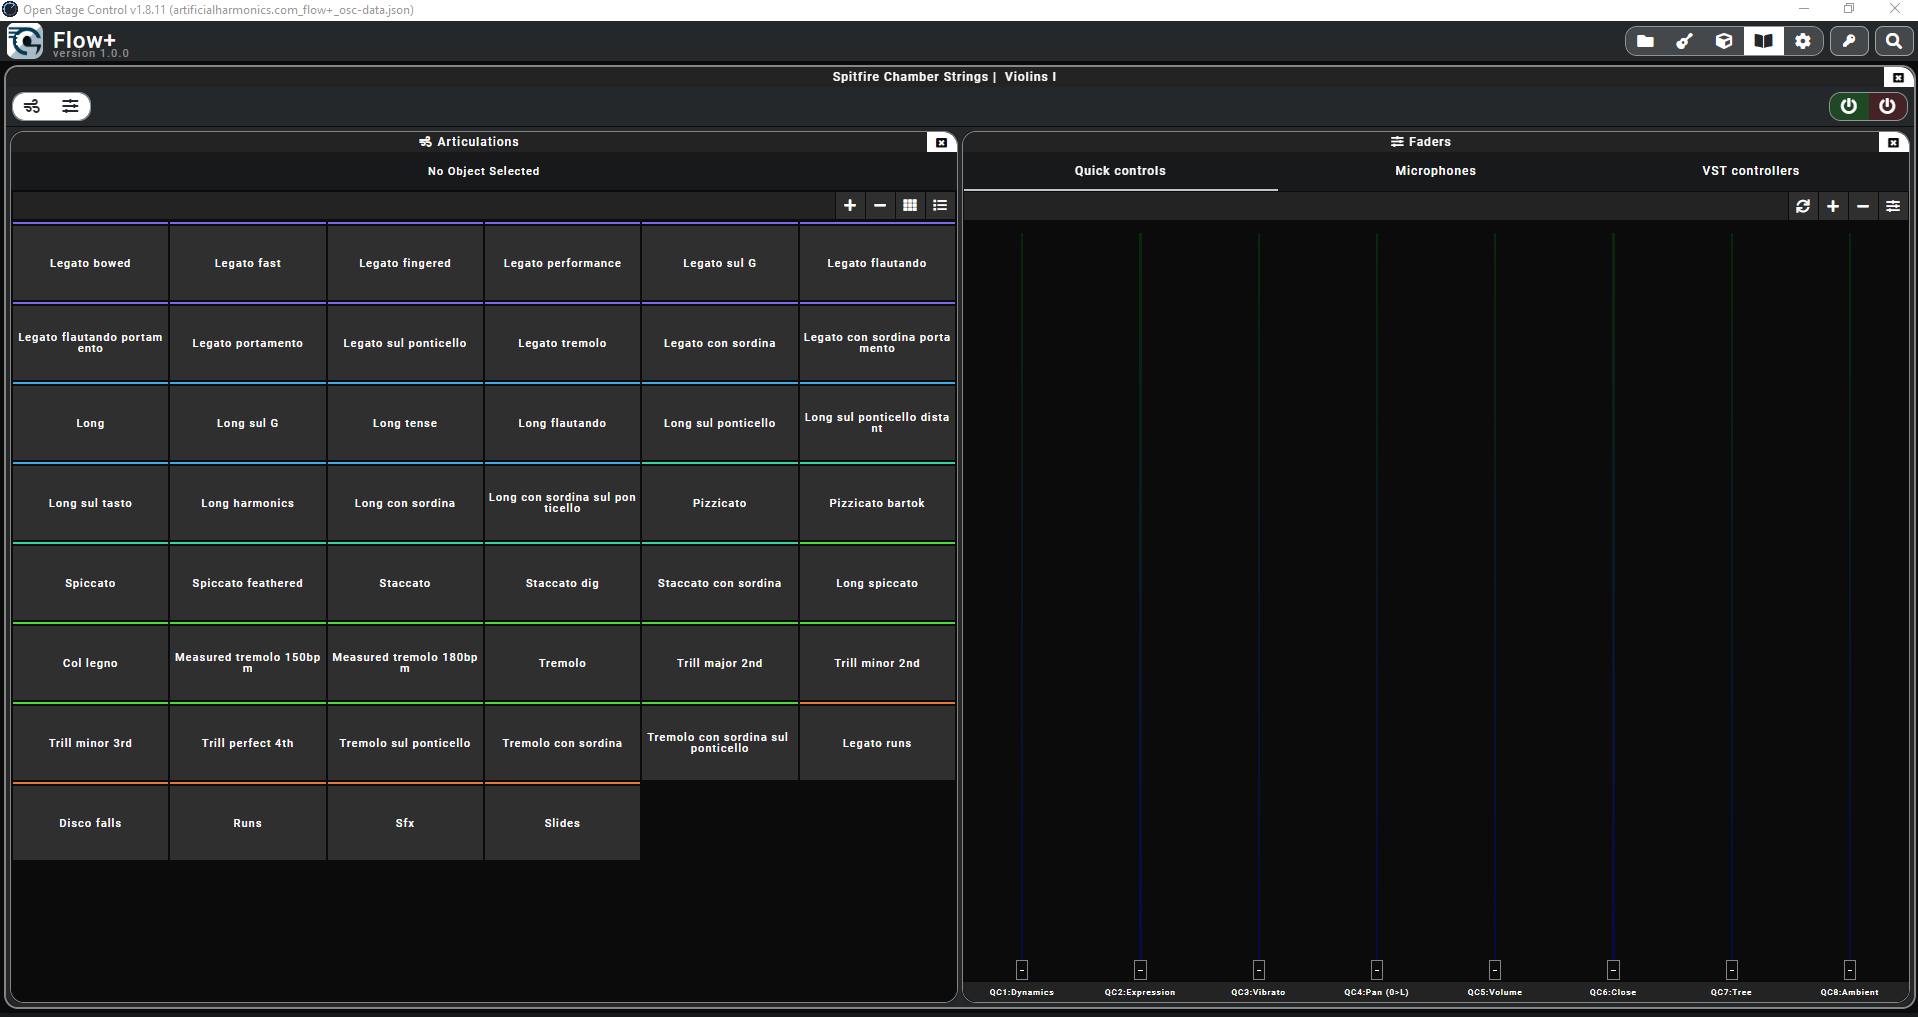
- Disable the track in Vienna: clicking this button you will disable the track in Vienna making the instrument disappear from your computer resources (great feature when dealing with huge templates)
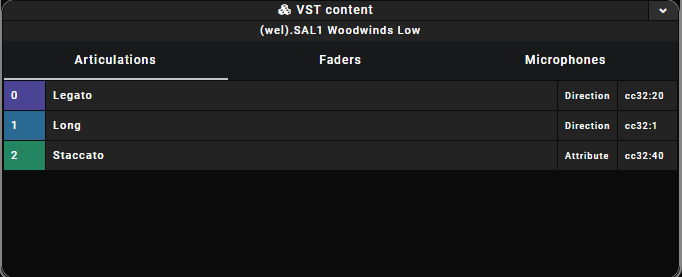
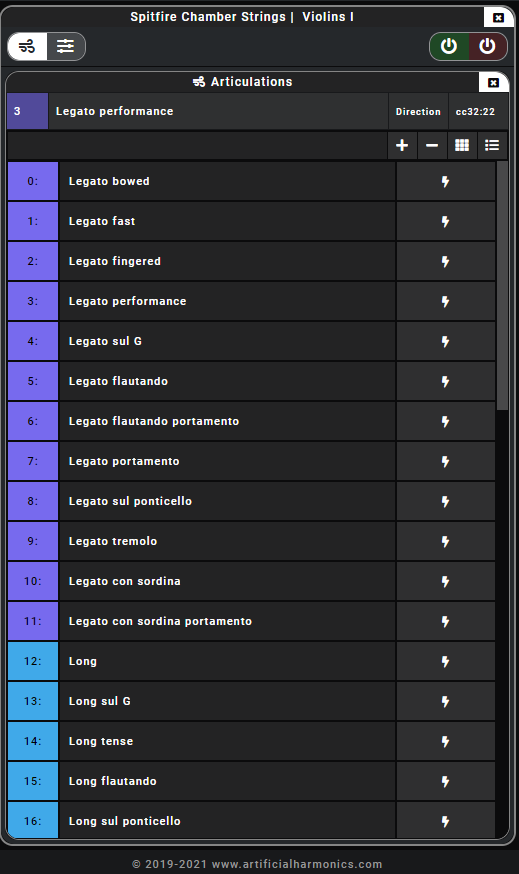
Through this area you will be able to switch the articulations of the selected instrument, just by clicking on the articulation button. The color and order of the articulation is a general setting of Flow and is coherent with the color and order that is in the expression map for Cubase.
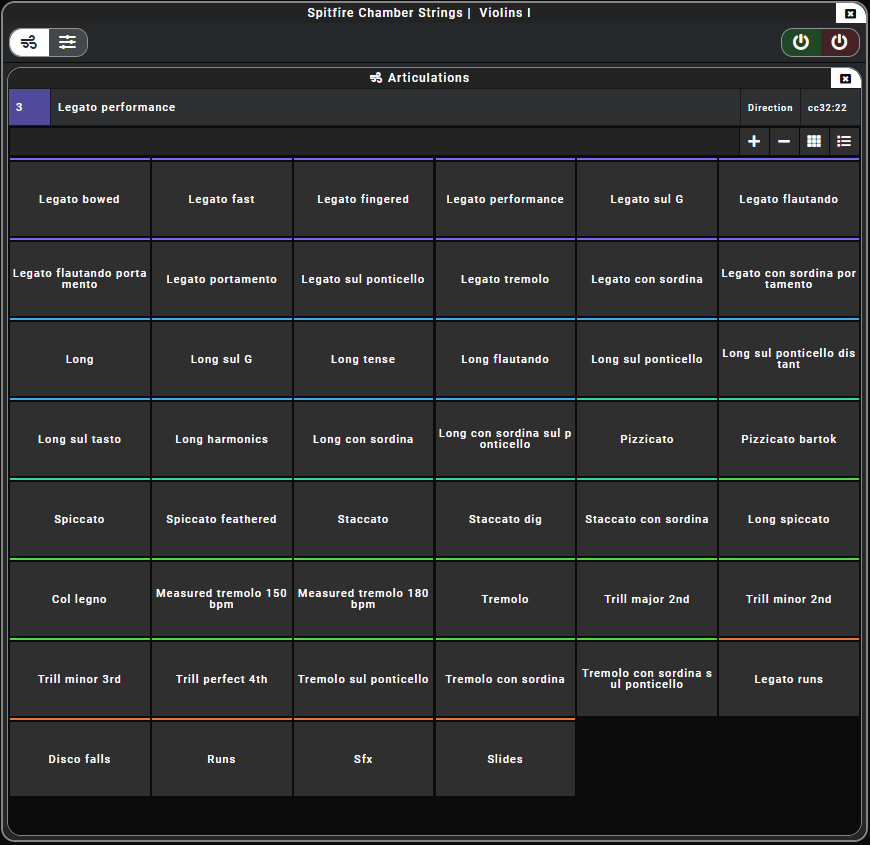
Once you will select an articulation you will see in the top of the window the details of the chosen articulation with the following information:
- number of the remote as defined in the expression map
- name of the articulation
- direction/attribute property as defined in the expression map
- midi messages that are used to trigger the articulation in Vienna, this might be some control changes or some key switches
In the master toolbar you also have a series of actions (from left to right)
- Show more: show more articulations per row (to adapt to your screen)
- Show less: show less articulations per row (to adapt to your screen)
- Grid mode: show articulations in grid mode which is the default one
- List mode: show articulations in list mode, useful when using a small device like a mobile phone (see picture below)
The list mode is very useful when using a small device, it looks like the picture below
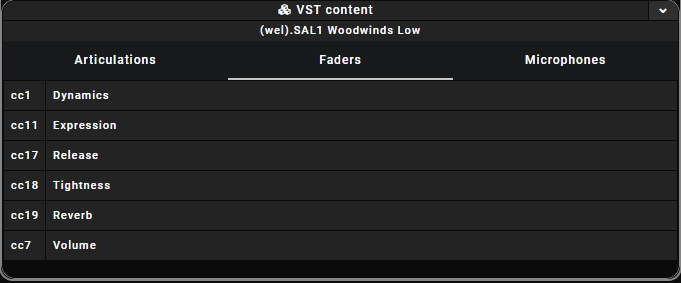
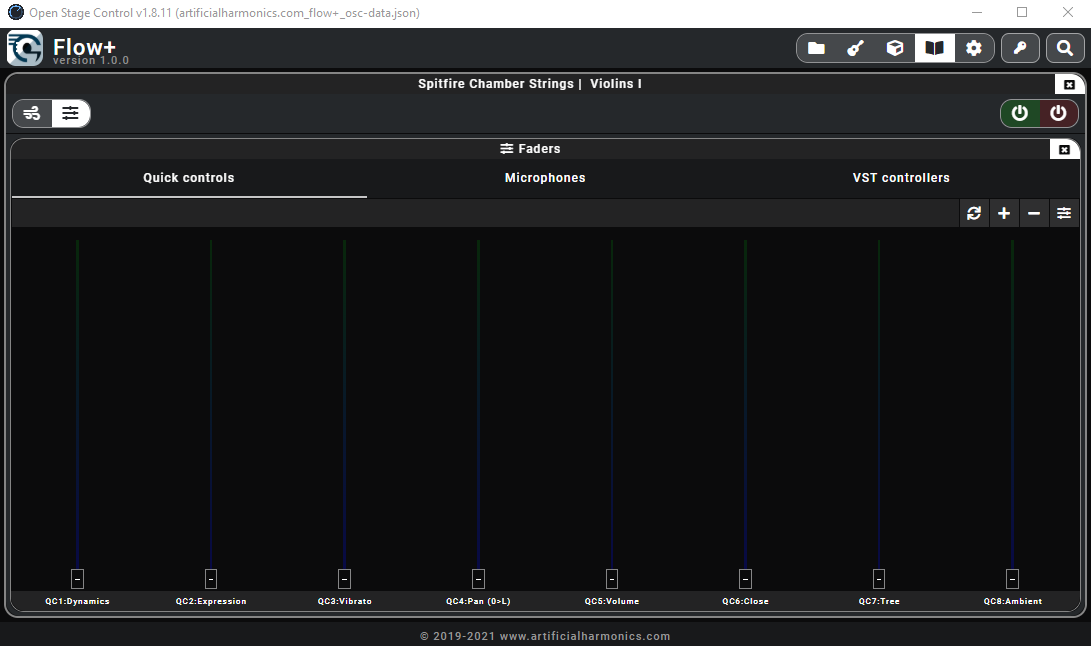
Through this area you will be able to do the following actions which will be applied to the host in Vienna associated to the track selected in DAW
- Record automation using Quick Controls setup
- Record midi automation for microphones
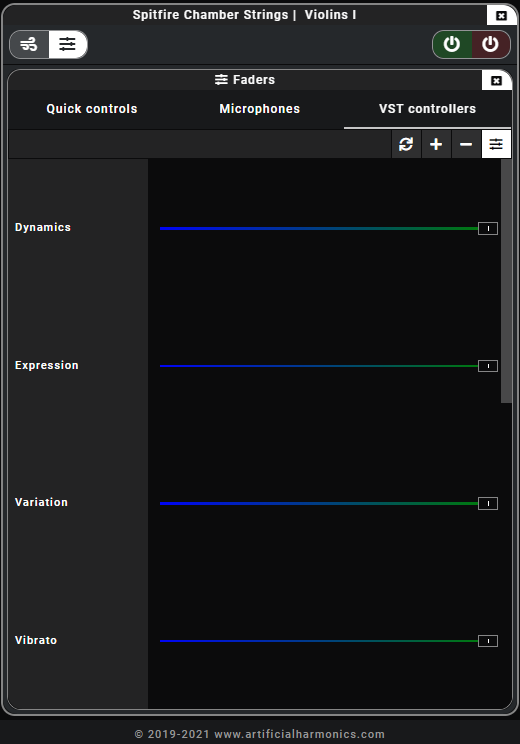
- Record midi automation for VST controllers
Quick controls window
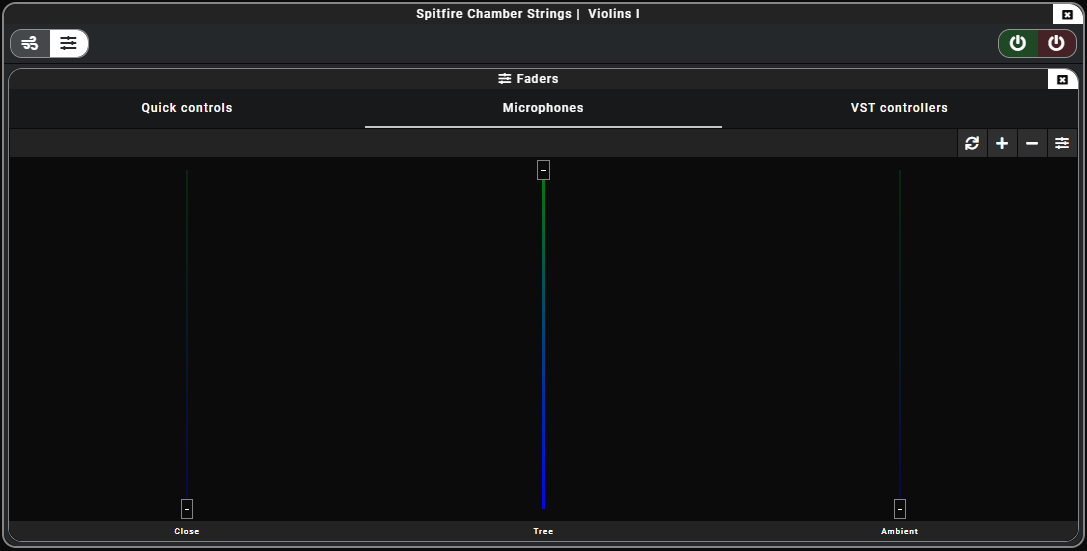
Microphones window
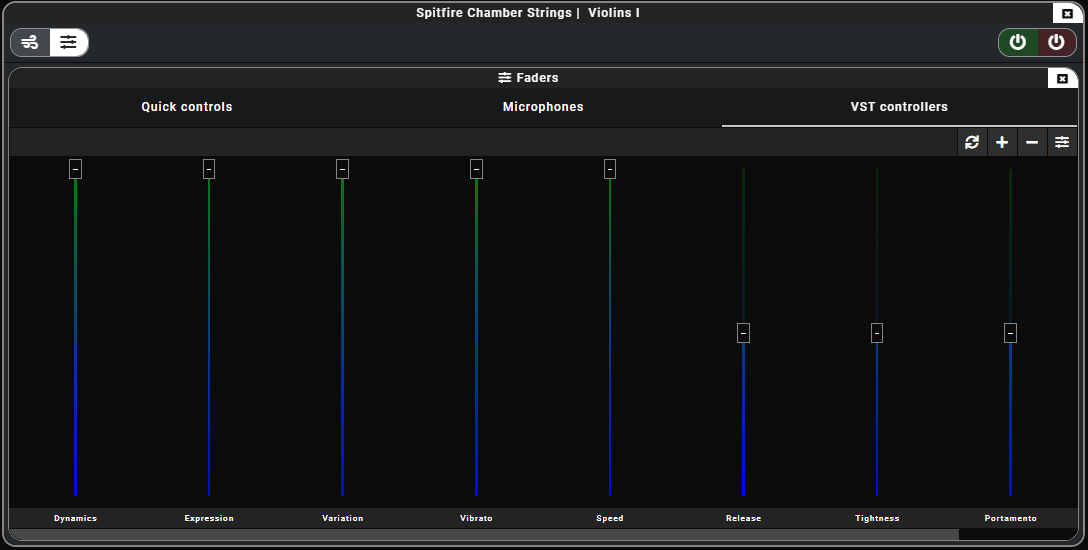
VST controllers window
The master toolbar of each of these windows has the following actions:
- Bidirectional faders: this allows you to have a bidirectional faders behavior to see the recorded midi automation. The button needs to be maintained pressed during all the monitoring activity. It activates the midi send 2 of the selected track in Cubase. It is important to understand that this works only if there is one and only one track in cubase with this midi send 2 activated, so make sure that when you use it you use it properly otherwise the data from multiple tracks will merge
- Show more: see more faders within the area
- Show less: see less faders within the area
- Horizontal view: switch to horizontal view which can be useful when working with small screens like a mobile phone
The horizontal view for faders looks like the picture below
The macros window contains a series of macros which have been programmed to interact with Cubase.
Each tab refers to a category of macros and contains a series of buttons.
Macros can be added via configuration files.