Cubase is one of the most popular digital audio workstations of our time. Flow2 uses the version Pro of Cubase because of its capability to handle the switching of articulations through expression maps, this can happen internally in Cubase (through the midi editor) or remotely via an external MIDI controller.
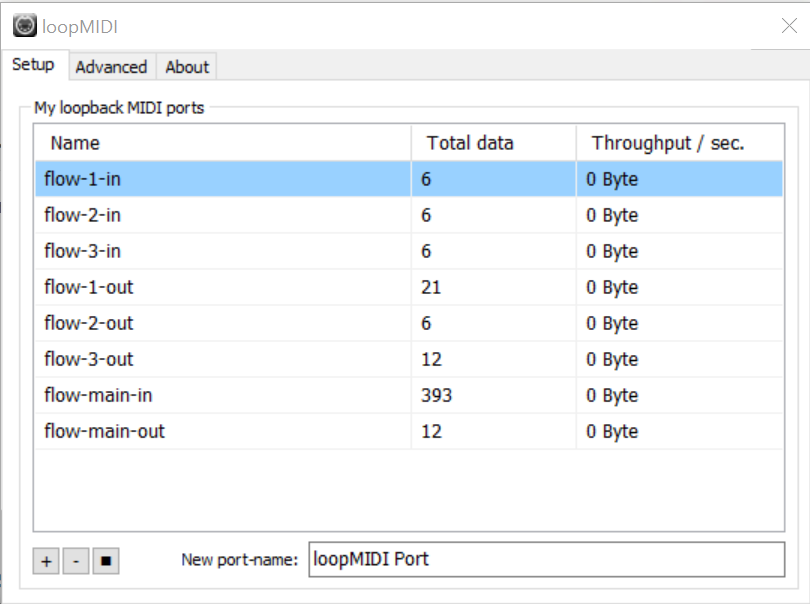
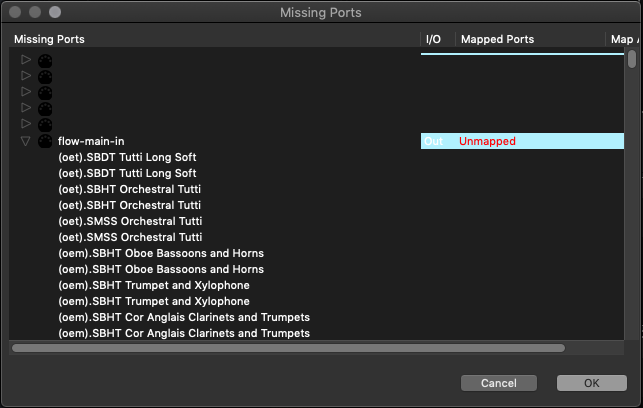
When you launch Cubase for the first time you might see a windows like this that says that one of the flows port are not mapped. Before closing this window make sure to click on the Unmapped red text and select the right port from the list. If the port is not in the list then it means you have not well configured the midi ports and you should come back to chapter 2
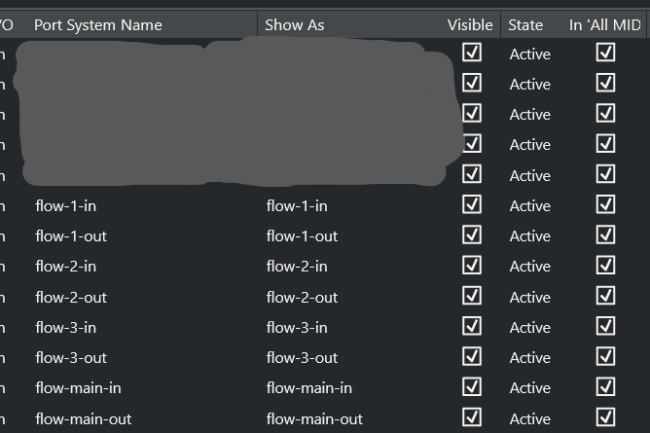
Also very important make sure all the flow ports area active and visible in the Studio Setup > MIDI Port Setup window as shown below
The first step to configure Cubase is to import the logical presets which are used by Flow application to control Cubase.
To do that you need to import the content of the folder Setup/Project Logical Editor into your Cubase folder Presets/Project Logical Editor (copying whole Flow2 folder).
Mac location:
User/Library/Preferences/Cubase/Presets/Project Logical Editor
Win location:
C:/Users/[your user]/AppData/Roaming/Steinberg/Cubase/Presets/Project Logical Editor
Win location for Cubase 12:
C:/Users/<user name>/Documents/Steinberg/Cubase/User Presets.
Copy the entire Flow folder with all its content into the Cubase Project Logical Editor folder.
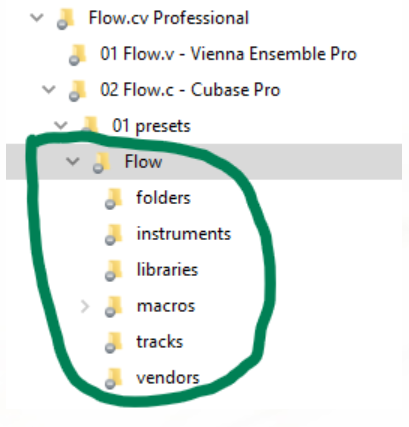
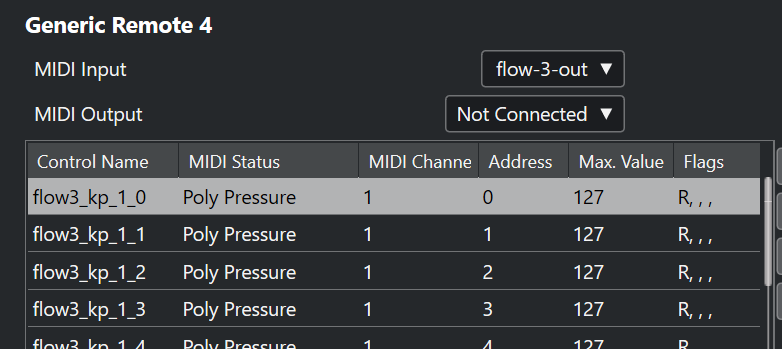
To setup Cubase you need to create one generic remote for each generic remote file located in the generic remote folder.
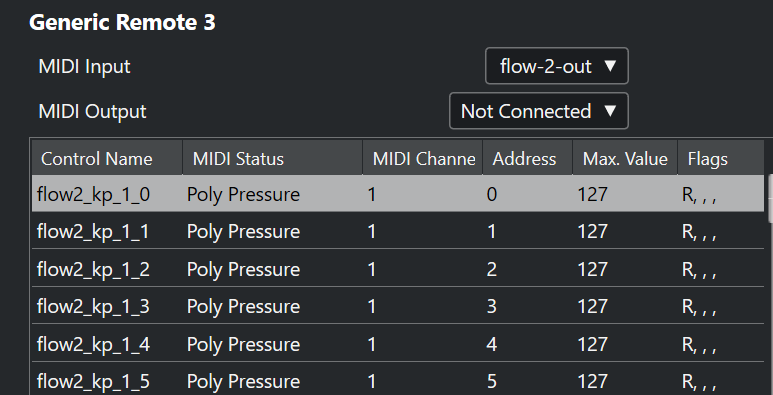
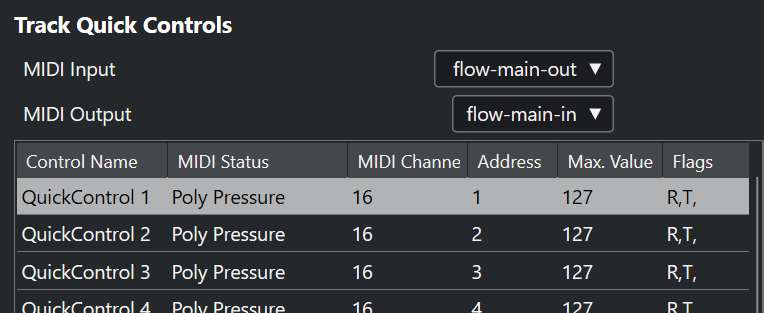
A generic remote can be added from Cubase in the menu Studio → Studio Setup → + Add device → Generic Remote, after creation import the generic remotes that are part of the Flow2 files you have downloaded. You also need to import the quick controls one in the standard “Track quick control” generic remote of Cubase.
After importing a generic remote set the midi input and output as specified in the name of the file (the in port in the out field)
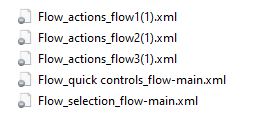
NB if there are more than one file for one port (for example you have Flow_actions_flow1(1).xml and Flow_actions_flow1(2).xml) you just need to create another generic remote with the same port setting and import that second file into it
Flow_selection_flow-main.xml
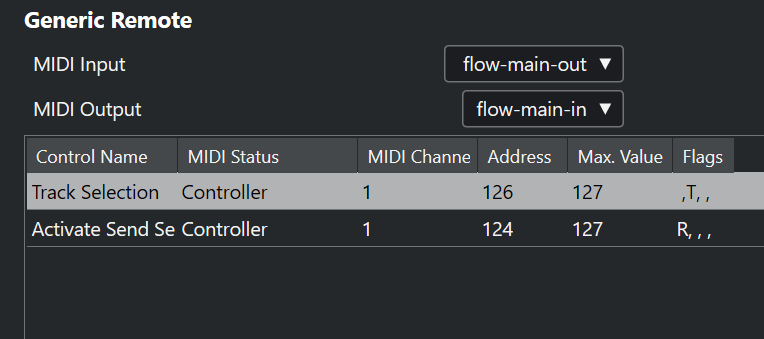
Flow_actions_flow1(1).xml
Flow_actions_flow1(2).xml
Both must be imported in two different generic remotes mapped to flow-1-out
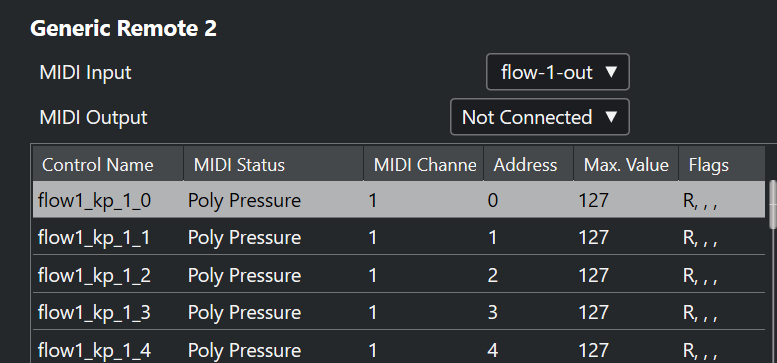
Flow_actions_flow2(1).xml
This generic remote is not anymore present since Flow version 3
Flow_actions_flow3(1).xml
Flow_quick controls_flow-main.xml
You need to change the way Cubase receives trigger to change articulations from a remote. The default setup is with a MIDI CC, you will need to switch to program change since this is the way Lemur communicate with Cubase to ask for an articulation switch.
Cubase will later transform this Program Change message into a MIDI CC and sent it through to Vienna which will then apply the change.
To change this parameter open the Flow2 Cubase project, select any instrument track, go to expression map, click setup Expression Maps (bottom of the long list) and in the dialog window set to Program change the parameter as shown in the picture on the left.

A restart of Cubase is required to make the copied presets available in the Project logical editor window
Open the Preferences settings located in the Edit menu and make sure the option “Enable Record on Selected Midi Track” is checked otherwise Cubase will not be able to send info on the selected track to Flow+

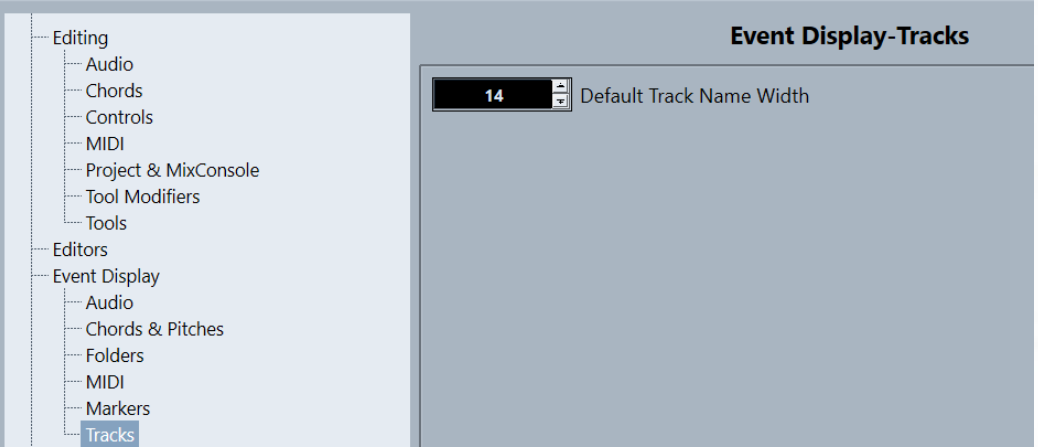
Also make sure to increase the width of the track names to the max value (currently 14 for Cubase 11)
