Toggle navigation

Flow 2 Adding libraries in Cubase and Vienna Ensemble Pro

Version 1.0

Scope of this document is to show how to add libraries in the Cubase and Vienna Ensemble Pro template, to prepare the integration with Flow+ application.

Adding new libraries inside Vienna Ensemble Pro is a very simple process.


1.1. Choosing the right instance to use

As first thing you need to decide in which Vienna instance you will add your new library.

Do not use any of the instances that are part of Flow since those will evolve with the development of Flow and you might have conflicts in the future

The ideal choice is to create your own instances, and to work with those ones, later on you will be able to export them and merge them back with any new updated version of Flow 2

1.2. Creating the channels

Now that you have decided in which Vienna instance you want to work, just create all the channels you need. This depends on how many tracks you want your library to be made of.

In Flow the approach is to have, when possible, one single cubase track per instrument, but you can always change this paradigm as best adapt to your new library.

Once you create your channel the steps to follow are simple:

  • Load inside the channel the plugin you want to use (e.g. Kontakt, SINE player…)
  • Set the name of the channel to reflect the loaded instrument
  • Set the output that you want to use for your channel, this will be then activated in Cubase and routed inside Cubase mixer
  • Set the instance and midi in and the channel number, and make sure that the same channel number is used inside the plugin

1.3. Creating the automation

You will need to create a new line per each created channel to allow Flow+ to activate and disable the Vienna instruments.

To do so go in the menu View->Automation Mapping, in the automation window click on the Midi Controllers tab and click on the + button to create the needed entry (one per channel)

Here you need to do the following configuration:

  • On the left side select the right Plugin Midi in, channel and CC for each of the created channel
  • On the right side select the track that refers to that channel and click on the Disable function

It will look like this in the end:

Next step is working on Cubase Pro, also in this case the process is very simple and need to be repeated for each of the track that you want to create.

2.1. Adding tracks

For each of the channel created in Vienna you probably want to create one track in Cubase.

When you do so, make sure to duplicate an existing track inside the target folder, this will facilitate the process since all the midi sends and some naming configuration will already be copied.

Duplicate your track inside the same folder where you want to create a new one

Finally you can change the name of the track by setting the code of the library (4 characters) and the name of the track.

When possible put the name of the instrument in the name of the track, this will simplify the show/hide functionality of Flow+ when working with instrument objects

Remember to remove the expression map that has been duplicated, since you will need to add a new one

2.2. Routing to Vienna

Once the track is created, you need to set the routing.

If you have created a new Vienna instance you will need to create a new rack in Cubase and connect it to the new instance.

To set the routing, select the new track in Cubase and go in the inspector top properties.

Here set the right Midi Plugin in and channel that refers to the channel you have created in Vienna Ensemble Pro.

Then, if you have created new outputs in Vienna Ensemble Pro, you need to activate them through the rack, set their name in the mixer and set the right routing. (See video for more explanation)

2.3. Expression map

Next you will need to create a new expression map for the added instrument.

To see how to create an expression map refer to the video here or the official Cubase documentation.

2.4. Midi send

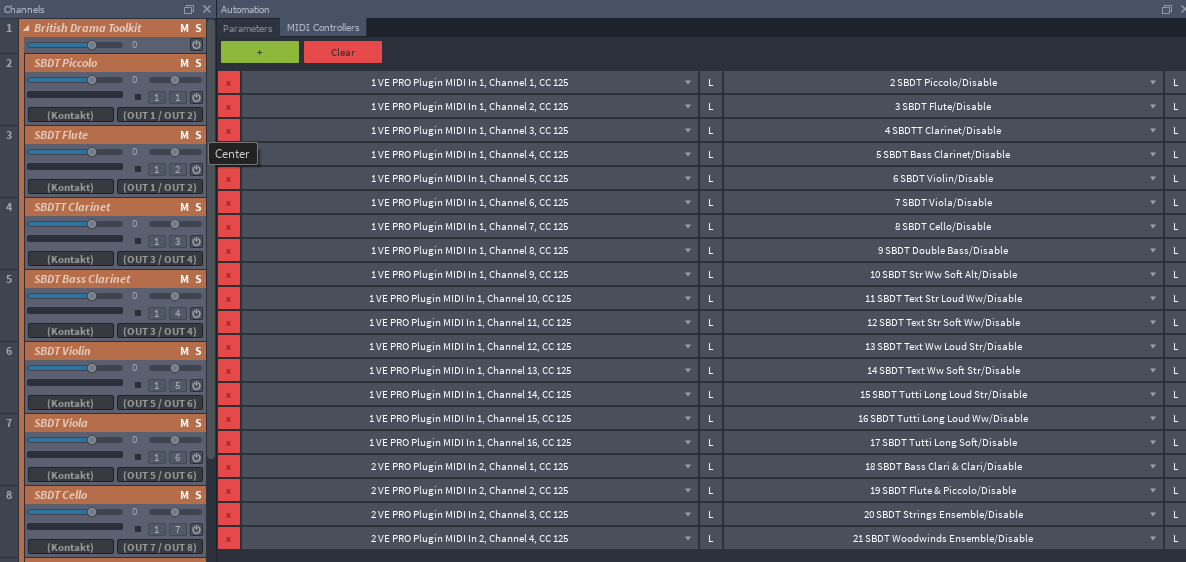
Last thing to do in Cubase is to set the midi send to a unique value that will be used to identify the track in Flow+

To do so select the track, go in the inspector->midi sends and click on the “Open/Close send effect editor” of the first midi send where a midi transformer is applied.

The unique ID of the track is the union of those three parameters:

  • midi channel set in the midi send
  • value 1 in the midi transformer
  • value 2 in the midi transformer

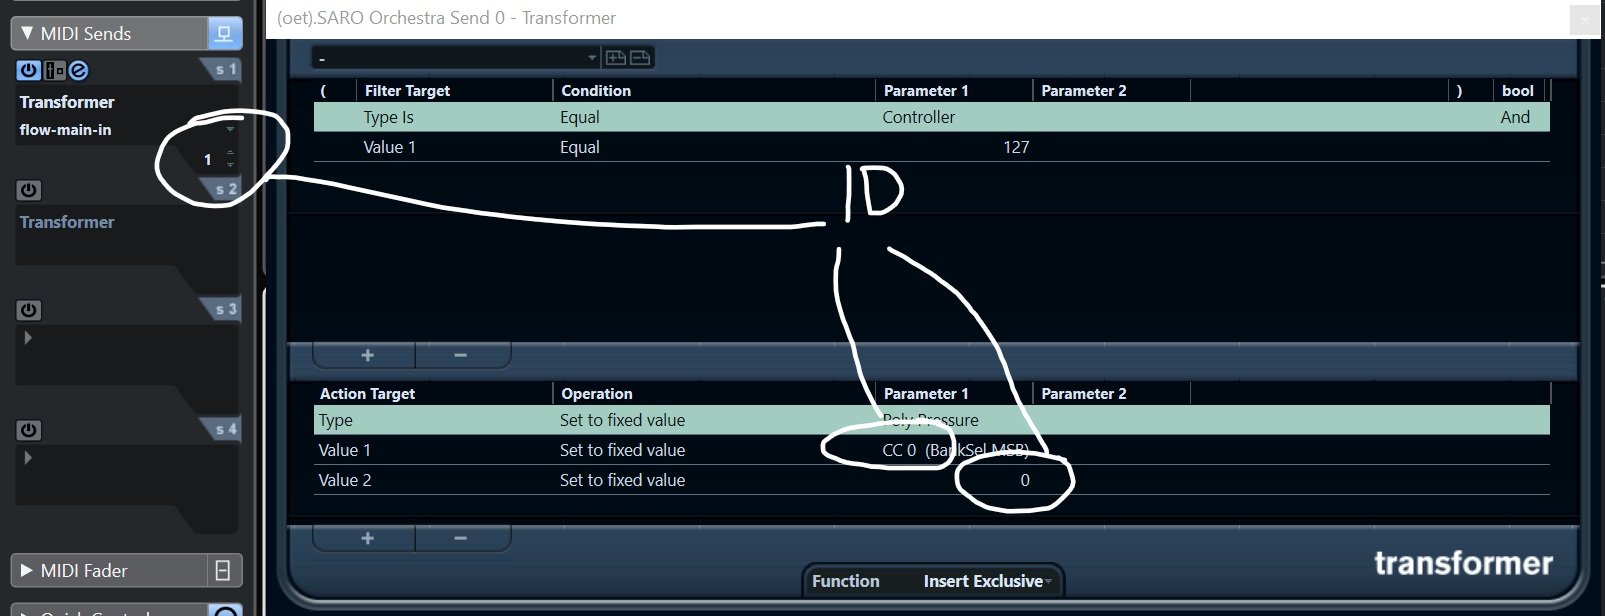
To avoid collision with the ids created for the new Flow libraries set your midi channels starting by 16 and going down, since Flow starts from 1 and going up.

For each midi channel there are 127*127 = 16129 assignable id 😀